Cereal baked blend: 5 Easy Ways to Create Crunchy Snack Bars!
Looking for a tasty cereal baked blend? Discover this easy recipe for nutty snack bars that are perfect for breakfast or a quick afternoon treat! Try it today.

- Is It Possible to Make Something as Classic as Cereal Even Better?
- Discover the Delight of Cereal Baked Blend
- The Ultimate Guide to Mastering Crispy Cereal Baked Blend
- Why You'll Love This Version of Cereal Baked Blend
- Health and Nutrition Highlights of Crispy Cereal Baked Blend
- Recipe at a Glance
- Master Ingredient List
- Kitchen Equipment Essentials
- Expert Cooking Method: Crispy Cereal Baked Blend
- Master Chef's Advice
- Perfect Presentation
- Storage and Make-Ahead
- Creative Variations
- Complete Nutrition Guide
- Expert FAQ Solutions
- Recipe Card
Is It Possible to Make Something as Classic as Cereal Even Better?
Picture this: you’re standing in front of your pantry, staring at a box of cereal. you know it’s delicious, but what if i told you there’s a way to transform that beloved breakfast staple into something even more scrumptious? honestly, it’s true! enter the crispy cereal baked blend — a wholesome twist that brings out the best in crunchy cereals.
Whether you're in a rush for breakfast or need a fun snack during the day, this recipe is a game-changer.
Easy enough for anyone to tackle, you’ll whip this up in about 40 minutes. ready to dive in?
Discover the Delight of Cereal Baked Blend
Cereal treats have been a family favorite for generations. from sweet rice treats first introduced to british households to variations that popped up all over the world, history has shown us just how versatile and loved these creations can be.
Our recipe offers a nod to the nostalgia of sunny mornings, with a fresh approach that incorporates all those delicious textures and flavors we crave.
What makes this crispy cereal baked blend stand out? well, it’s not just about the fun of combining various cereals — it’s the beautiful harmony of honey, nutty goodness, and a sprinkle of cinnamon.
We’re talking about a crunchy masterpiece that's brimming with wholesome ingredients. you know what else? it’s perfect for kid-friendly snacks or even just as your own guilty pleasure while catching up on the latest series.
The Ultimate Guide to Mastering Crispy Cereal Baked Blend
This recipe is born from a rich culinary heritage, where families used what they had on hand. imagine early bakers combining oats and nuts to create something delightful for long winter evenings—it’s that spirit we channel with this baked cereal blend .
The origin is fascinating too! while sweet treats have been baked for centuries, adding cereals into the fold is relatively modern but oh-so-inspiring.
Culturally, grabbing a bowl of cereal is like a morning ritual for many families, and who doesn't want to keep that tradition while making it even cooler? More recently, the Crispy Cereal Baked Blend has gained popularity in health circles for its nutritious benefits, transforming breakfast into a fun affair, any time of day!
Why You'll Love This Version of Cereal Baked Blend
Let’s talk flavors! the combination of chewy oats, crisp puffed rice, and crunchy nuts is a dream come true. it’s like a cozy hug for your taste buds! plus, the foolproof techniques in this recipe make it straightforward enough that even the biggest cooking novices can follow along.
I’ve tried various methods, and trust me, this one is expertly tested and time-efficient.
But wait, there’s more! the best part is its versatility. you can toss in whatever nuts or even dried fruits you have lying around.
Want to experiment further? why not mix in some mini chocolate chips for that cheeky afternoon treat? it’s all about making this recipe yours.
A little of this, a little of that — it’s a crowd-pleaser for everyone!
Health and Nutrition Highlights of Crispy Cereal Baked Blend
Now, let’s get to the good stuff—nutrition! this crispy cereal baked blend is not just tasty but packed with benefits.
Rolled oats bring fiber to the table, which keeps you feeling full and energized throughout the morning. who doesn’t love that? throw in some healthy fats from nuts, and you’ve got yourself a balanced, energizing snack recipe that checks all the boxes.
Even better, this recipe can be tailored to fit various dietary needs. If you go for nut butters, you’re deepening that nutty flavor while accommodating for those seeking a dairy-free snack.
Recipe at a Glance
- Total Preparation Time: 40 minutes (with just 15 minutes of active prep)
- Skill Level Required: Easy-peasy, perfect for all cooking ensoiasts
- Serving Size: About 8 servings, which means you can share or snack guilt-free!
- Cost Efficiency: Totally budget-friendly—use pantry staples and leftovers.
Stay tuned because in the next section we’re diving into the fun part—getting everything you need organized for your Crispy Cereal Baked Blend ! Ready to gather those ingredients? I promise you’re just a few steps away from enjoying this nutty, crunchy delight!
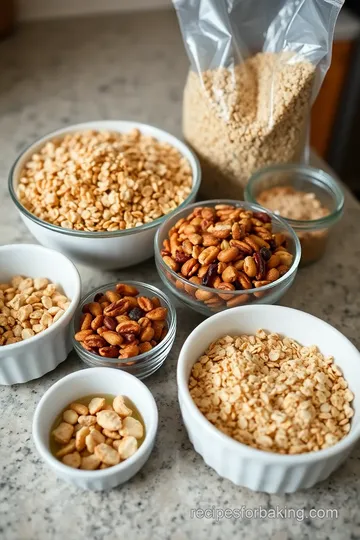
Master Ingredient List
Alright, friend, let’s dive into the heart of the kitchen where all the magic happens—our master ingredient list ! here’s where we gather everything we need to whip up the most delicious crispy cereal baked blend .
Trust me; this recipe is going to rock your snacking world!
Premium Core Ingredients
First up are our premium core ingredients , and let me tell you, they’re essential! for this baked cereal blend, you’ll need 2 cups of rolled oats and 1 cup each of puffed rice cereal and granola .
Now, when you’re choosing granola, go for one that has a mix of nuts and dried fruit . look for granolas that aren’t loaded with added sugars or funky preservatives.
When it comes to storage, keep these oats and cereals in airtight containers. oats can last for a couple of months on your shelf, while opened cereals should ideally be eaten within a month for maximum crunchiness.
Signature Seasoning Blend
Next, onto our signature seasoning blend ! this part is like giving a nod to those childhood cereal flavors that we loved.
We’re mixing in 1 teaspoon of ground cinnamon , which is like sprinkling a bit of happiness on top. trust me; cinnamon has this magical way of enhancing the sweetness of everything without being overly sugary.
And speaking of sweetness, we have to mention our binding agents: 1/3 cup of honey (or maple syrup) and 1/4 cup of nut butter .
These help keep everything together while adding a lovely richness to your crunchy cereal snack .
Smart Substitutions
Let’s not forget about smart substitutions —because life happens, right? if you find yourself short on honey, maple syrup works like a charm.
You can swap out almond butter for sunflower seed butter if you’re aiming for nut-free and want to steer clear of any allergens.
And if you can’t find puffed rice, just grab any crunchy cereal you’ve got at home! the versatility of this recipe is unmatched .
Kitchen Equipment Essentials
Now that we’ve got our ingredients laid out, let’s chat about the kitchen equipment essentials you’ll need. seriously, this part is a breeze! you’ll need a large mixing bowl, a good baking pan (9x13 inches is perfect), and maybe some parchment paper if you want easy cleanup.
A rubber spatula will make your life easier for mixing everything well, and don't forget those measuring cups!
I can't stress how much I love my wooden spoons . They're just classic, you know? You don't need fancy gadgets or tools—keeping it simple is the foolproof way to go.
Pro Ingredient Tips
Okay, don’t tell anyone, but here’s a little pro ingredient tip : always taste your nut butters before using them.
You’re aiming for that creamy texture and rich flavor, so grab a spoon and dig in if you need to choose between several! while we’re at it, remember that freshness is key .
Store your nuts in the fridge to maintain that crunchiness—nobody likes stale snacks!
And here's a nice money-saving tip: buy in bulk! grab those oats and nuts from the bulk bins at the grocery store to save some pennies.
You can make your own homemade granola bars, which are way healthier and cheaper compared to store-bought.
So, there you have it—the secrets to pulling together the perfect cereal baked blend . now that we’ve got our ingredients and equipment sorted, we’re one step closer to creating those nutty snack bars that will be perfect for breakfast on-the-go or just an afternoon pick-me-up.
Don't you just love how easy it is to create wholesome cereal treats ?
Stay tuned for the next part, where I’ll be walking you through the step-by-step instructions to bring your crispy, nutty blend to life! Get ready; your taste buds are in for a treat!
Expert Cooking Method: Crispy Cereal Baked Blend
Let me tell you about one of my favorite go-to recipes: the crispy cereal baked blend ! honestly, it’s like a warm hug from your childhood.
Picture this: a mix of crunchy cereals, honey-sweet goodness, and just a sprinkle of cinnamon. it’s like instant nostalgia, and i know you’ll love it too! perfect for breakfast or an afternoon snack, this recipe brings all the wholesome vibes to the table.
Ready? let’s dive into the preparations and get you cooking!
Essential Preparation Steps
Okay, first things first: mise en place . this fancy french term just means “everything in its place.” trust me; it’s a lifesaver.
Grab all your ingredients—oats, puffed rice, chopped nuts, and that sticky honey. line your baking pan with parchment paper. it’s not just for looks; it makes cleanup a breeze.
Seriously, you're gonna want that extra padding between your cleaner-self and the pan!
Now, let’s chat prep techniques . i find that measuring everything out before you start baking keeps things flowing smoothly. it’s like laying the groundwork before finally getting to the fun part! plus, it prevents those panic moments when you’re halfway through and realize you’re missing a vital ingredient (which has definitely happened to me).
Time management? oh, i’m all about it. the whole process takes about 40 minutes—15 for prep and 25 for baking.
Set a timer for those 25 minutes because you will want to keep an eye on those edges turning golden brown.
Organization tips ? keep your mixing bowls clean and tidy, so you aren’t knee-deep in chaos while trying to whip up your delicious snack!
Professional Cooking Method
Let’s get into the nitty-gritty of the actual cooking. first, preheat your oven to 350°f (175°c) . this step isn’t just a formality; it’s key to achieving that lovely golden crust.
While the oven’s heating up, mix those rolled oats, puffed rice, granola, and chopped nuts together in a large bowl.
In a separate bowl, the real magic happens. whisk together the honey , nut butter , vanilla extract , and of course, the ground cinnamon .
This mixture is the glue for our cereal concoction—it needs to be velvety smooth, so no lumps, please. pour it over your cereal mix, combining it all with a rubber spatula until everything is coated beautifully.
Now, transfer that sticky goodness into your prepared baking pan. press it down firmly! i can’t stress this enough. if you don’t press it down, it might crumble apart after baking.
Got it? bake for about 25 minutes , and you’ll know it's ready when the edges look golden and your kitchen smells like a little slice of paradise.
Expert Techniques
This is where the real fun begins. i want you to be professional-level precise here. throughout the bake, keep a close eye on the dish.
Remember, timing precision is what separates the good from the great! check it at 20 minutes just for good measure; it’ll also give you that warm, fluffy feeling as it bakes.
Success indicators ? look for golden edges and a bubbly top. you should also see some light browning—don’t let it get too dark; nobody wants charcoal bars! once it’s done, don’t hastily dig in.
Let it cool completely before you cut into bars or squares. believe me, they’ll crumble if you're not patient.
Success Strategies
Now! if things don’t go according to plan, don’t stress. for a quick troubleshoot, ensure you’ve pressed the mixture down effectively.
If your bars aren’t holding together, it’s likely too crumbly—just remember to pack it tightly next time. for quality assurance , store these treats in an airtight container.
They’ll stay fresh and crunchy; just make sure they’re cooled completely first!
Want those perfect results? remember, experimenting is part of the fun! try swapping in different cereals or nuts if you’re feeling sassy.
The beauty of this cereal baked blend is that you can customize it to suit the tastes of your family!
Feeling inspired yet? great! i can't wait to share some more ideas about how to pair these scrumptious treats with various toppings and sides.
Now, let’s hop into the next section, where we explore additional information you’ll want for whipping up these delicious bites—trust me, it’ll just add to the fun!
Master Chef's Advice
Oh my gosh, have you ever tried those nutty snack bars that make you feel like you’re indulging but still eating healthy? honestly, i’m all about turning simple ingredients into something magical in the kitchen.
When i first attempted my crispy cereal baked blend , i thought it’d be just another snack, but boy was i wrong!
Here’s some professional insight : when you’re whipping up a recipe like this, don’t skimp on the nut butter. it’s the glue that holds everything together and adds that creamy touch.
Kitchen wisdom says to always taste as you go! a little extra honey or a dash of cinnamon can elevate your homemade granola bars into a sweet masterpiece.
And the best part? If you follow these simple tips, I guarantee your batch will be a success. Trust me, your friends and family will be begging for seconds!
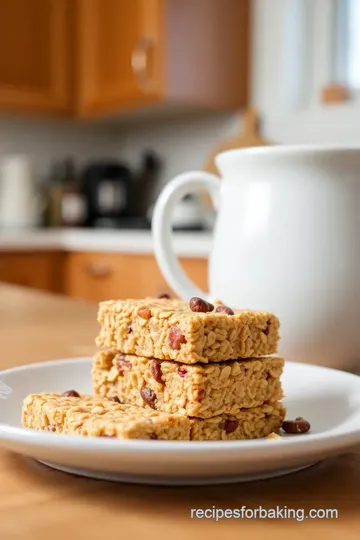
Perfect Presentation
Now, let’s talk looks. you know that saying, “we eat with our eyes first”? super true! for my cereal baked blend , i like to get a little fancy with plating.
Instead of just tossing them on a plate, try stacking them like a leaning tower of crispy goodness.
A sprinkle of powdered sugar or a drizzle of melted chocolate on top instantly transforms these sweet cereal bakes into an afternoon treat that looks like it came straight from a bakery.
You can also plate them with a side of fresh fruit — think bananas or strawberries mixed right in with some cereal and yogurt parfait action.
It's all about that visual appeal , and let’s face it, it’s just more fun to eat!
Storage and Make-Ahead
One of my favorite aspects of this recipe? the make-ahead option! once you bake a batch of these delicious squares, they can last quite a while.
Storage guidelines are simple: keep your homemade granola bars in an airtight container, and they’ll stay fresh for about a week.
If you want to go the extra mile, you can freeze them. that way, you'll have healthy, portable snack bars ready for those busy mornings or when friends drop by unexpectedly.
Just toss one in the microwave for a quick reheat, and you've got yourself a delightful energizing snack recipe .
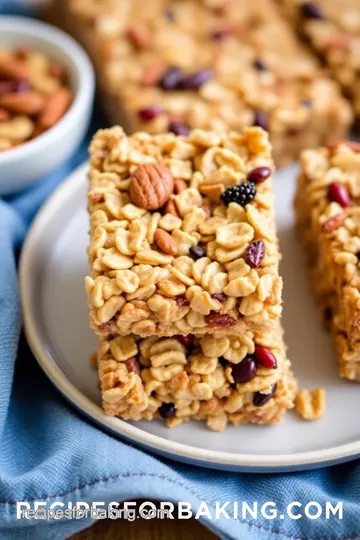
Creative Variations
Now, let’s get creative! you might like this flavor twist: what if you tossed in some dried fruit ? imagine biting into those crispy layers and finding gooey pieces of apricot or cranberries — yum! you could even adapt this recipe to fit different dietary needs; swap out the honey for agave or replace those nutty elements with sunflower seed butter for a nut-free option.
If you want to get really fancy, try a seasonal twist by adding pumpkin spice in the fall or even a dash of peppermint in winter.
The possibilities are endless with different variations of cereal bars . this way, you can customize them however you fancy!
Complete Nutrition Guide
Let’s not forget about the nutrition side of things! these crispy little squares are not just tasty but also pack a punch in the health department.
With oats and nuts, you’ve got a nutritious breakfast option or an afternoon snack that keeps you full.
Here’s a rough breakdown (i swear you’ll be amazed!): each serving is about 180 calories , providing plenty of wholesome energy without a sugar crash.
Plus, with fiber and protein included from the oats and nuts, you're fueling your body the right way. keep portion sizes in mind, though — because trust me, it’s so easy to devour a few too many at once, especially when they’re so delicious!
Expert FAQ Solutions
Now come the common concerns — and i’ve been there. you might be wondering why your cereal baked blend just won't stick together.
A little tip? make sure to press the mixture firmly into the pan before baking. it ensures that everything holds together once those delicious squares come out of the oven.
And what about those uncooperative chocolate chips? just sprinkle them on when the bars are still warm — they'll melt slightly and create a wonderful glue effect .
Honestly, don’t be afraid to adjust and have fun with your baking. if you’re having issues, just remember troubleshooting is part of the process!
In conclusion, this crispy cereal baked blend recipe is an excellent way to indulge without the guilt. whether you’re enjoying them as a quick breakfast, an energizing afternoon treat, or a snack on-the-go, these bars deliver on all fronts.
With a bit of creativity and a sprinkle of love, you’ll be savoring every crunchy, nutty bite. go ahead, dive in, and get those ovens preheating! happy baking!
Cereal baked blend: 5 Easy Ways to Create Crunchy Snack Bars! Card
⚖️ Ingredients:
- 2 cups (150 g) rolled oats
- 1 cup (75 g) puffed rice cereal
- 1 cup (90 g) granola with nuts and dried fruit
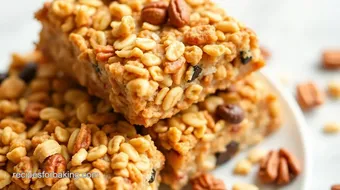
- 1/2 cup (60 g) chopped nuts (almonds or walnuts)
- 1/3 cup (100 g) honey or maple syrup
- 1/4 cup (60 ml) unsweetened nut butter (almond or peanut butter)
- 1 teaspoon (5 g) vanilla extract
- 1 teaspoon (2 g) ground cinnamon
- 1/4 cup (40 g) mini chocolate chips or dried fruit (optional)
🥄 Instructions:
- Step 1: Preheat the oven to 350°F (175°C).
- Step 2: Line a baking pan with parchment paper for easy removal.
- Step 3: In a large mixing bowl, combine rolled oats, puffed rice, granola, and chopped nuts.
- Step 4: In a separate bowl, whisk together honey (or maple syrup), nut butter, vanilla extract, and cinnamon until smooth.
- Step 5: Pour the binding mixture over the cereal mix and stir until evenly coated.
- Step 6: Transfer the mixture to the prepared baking pan and press down firmly.
- Step 7: Bake for about 25 minutes, or until the edges are golden brown.
- Step 8: Let cool completely before cutting into squares or bars.
- Step 9: (Optional) Sprinkle mini chocolate chips or dried fruit on top while still warm.
Previous Recipe: Best catering baked beans: 5 Easy and Delicious Recipes to Try!
Next Recipe: Challah Bake Event: 5 Easy Steps for Delicious Braided Bread!